Run in Extension Mode (GUI)
This tutorial introduces how to interface with the Pegasus Simulator working in extension mode, i.e. with an interactive GUI.
This means that ISAACSIM will be launched as a standard application and the Pegasus Simulator extension should be
enabled from the extension manager.
0. Preparation
Before you proceed, check the Installing the Pegasus Simulator section first, if you haven’t already. You will also require QGroundControl to control the vehicle. You haven’t download it yet, you can do it here or follow these steps:
Open a new terminal and run:
sudo usermod -a -G dialout $USER
sudo apt-get remove modemmanager -y
sudo apt install gstreamer1.0-plugins-bad gstreamer1.0-libav gstreamer1.0-gl -y
sudo apt install libqt5gui5 -y
sudo apt install libfuse2 -y
Download the QGroundControl App Image.
Make the App image executable
chmod +x ./QGroundControl.AppImage
Execute QGroundControl by double-clicking or running:
./QGroundControl.AppImage
1. Simulation Steps
Open
ISAACSIM, either by using the terminal command:isaac_run
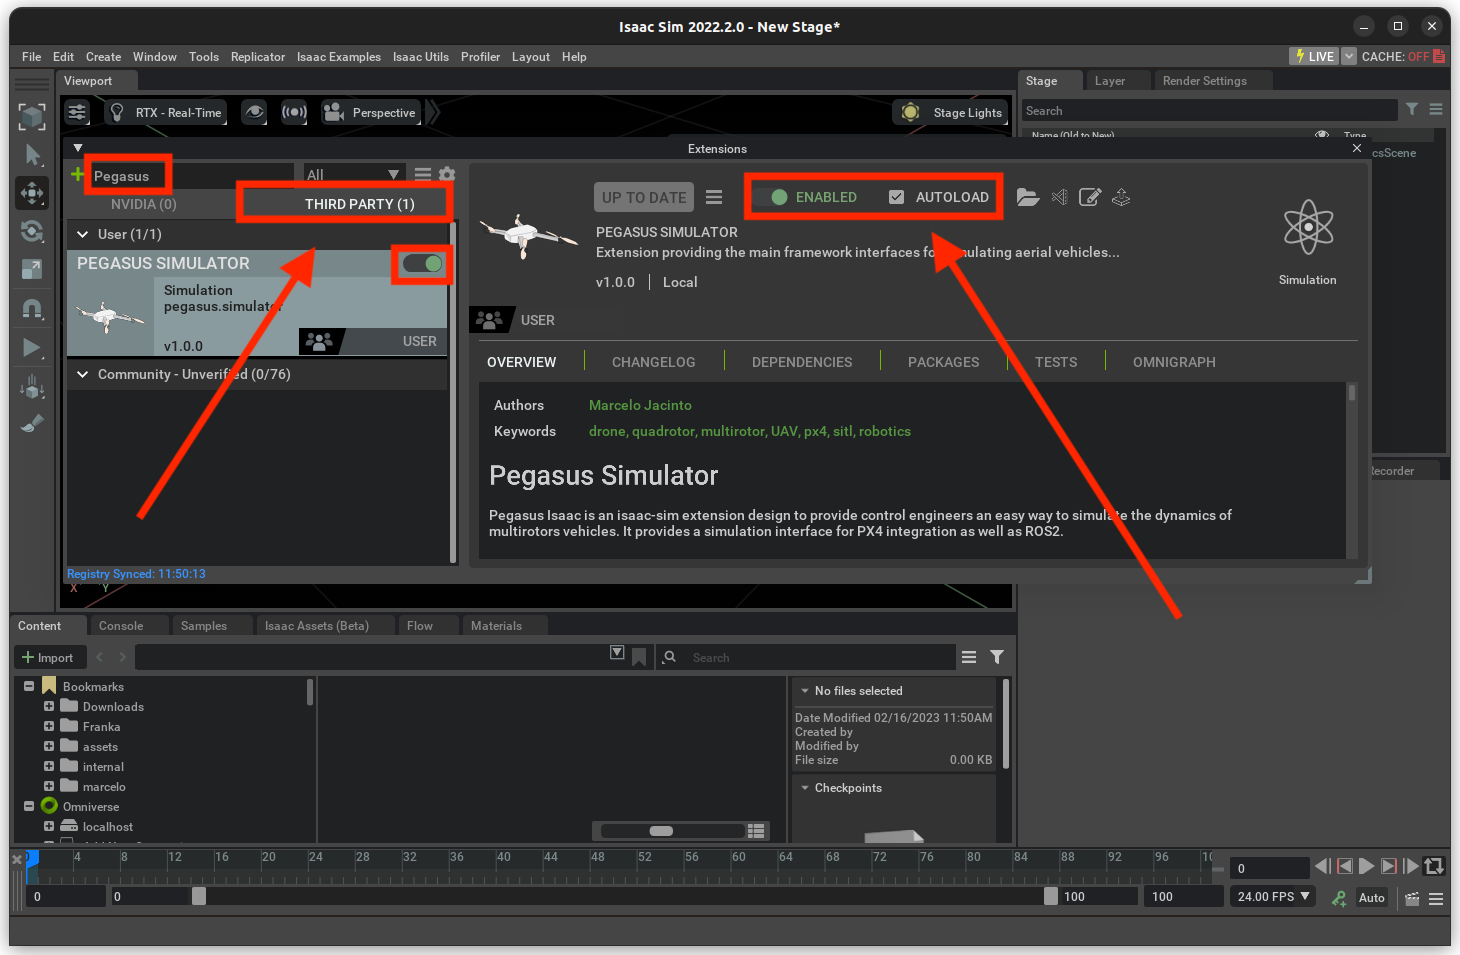
Make sure the Pegasus Simulator Extension is enabled.
On the Pegasus Simulator tab in the bottom-right corner, click on the
Load Scenebutton.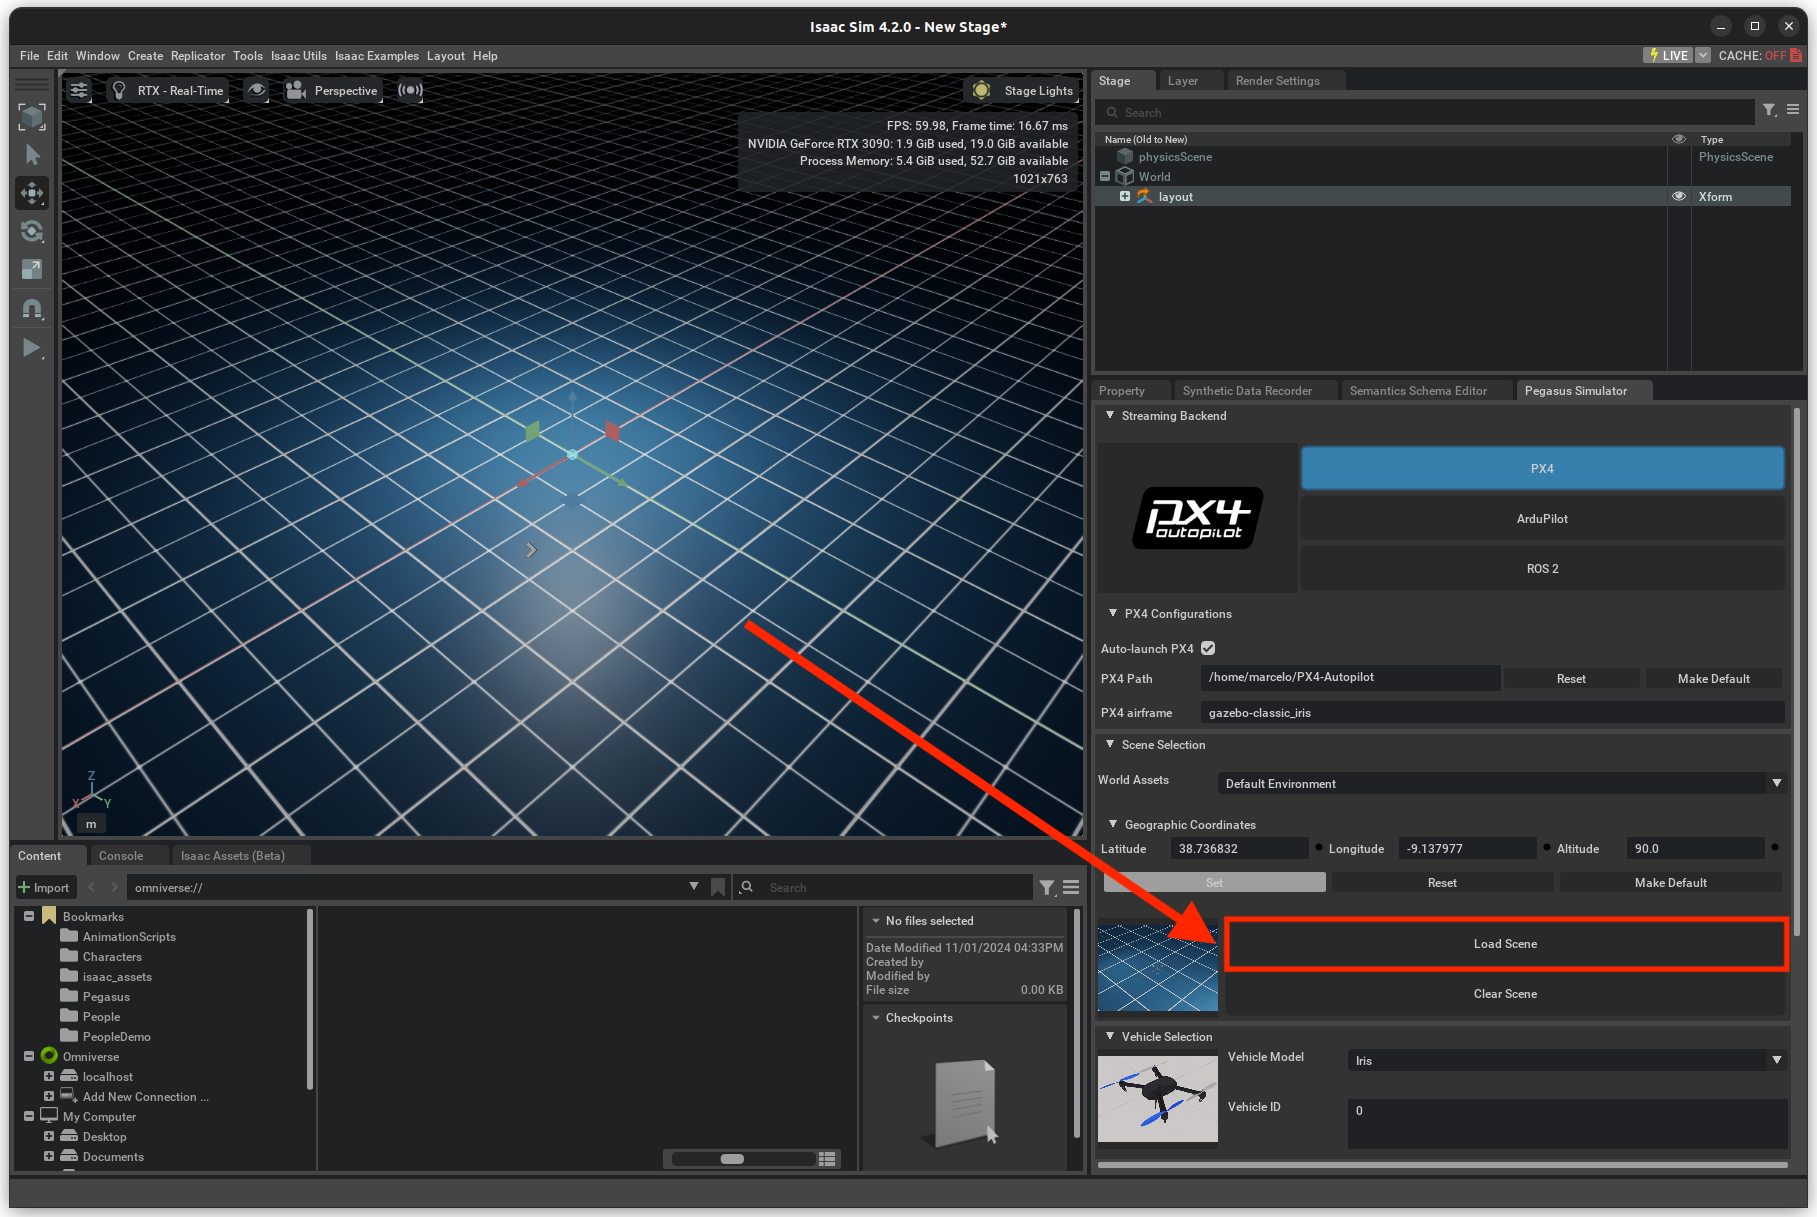
Again, on the Pegasus Simulator tab, click on the
Load Vehiclebutton.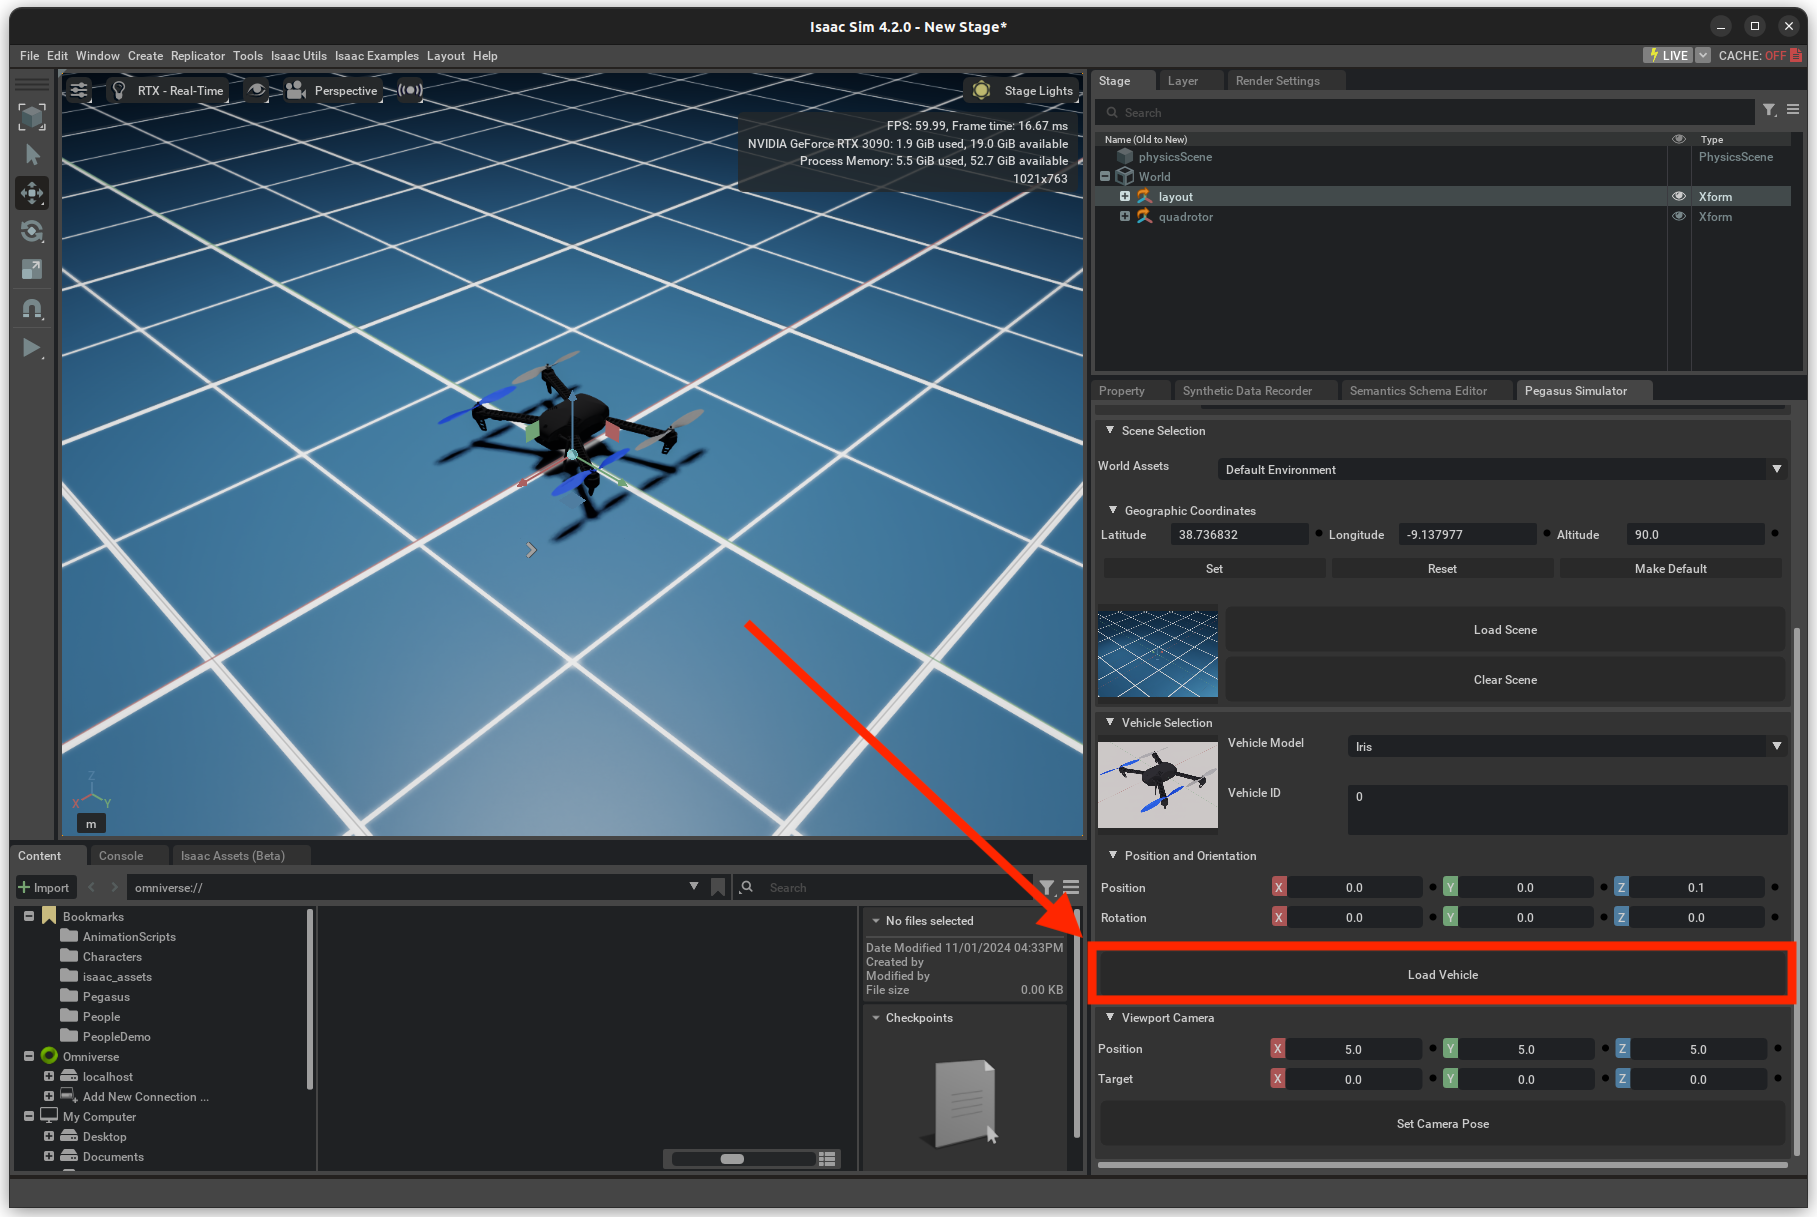
Press the
playbutton on the simulator’s control bar on the left corner.
6. On QGroundControl, an arrow representing the vehicle should pop-up. You can now perform a take-off, but pressing the
take-off button on top-left corner of QGroundControl.
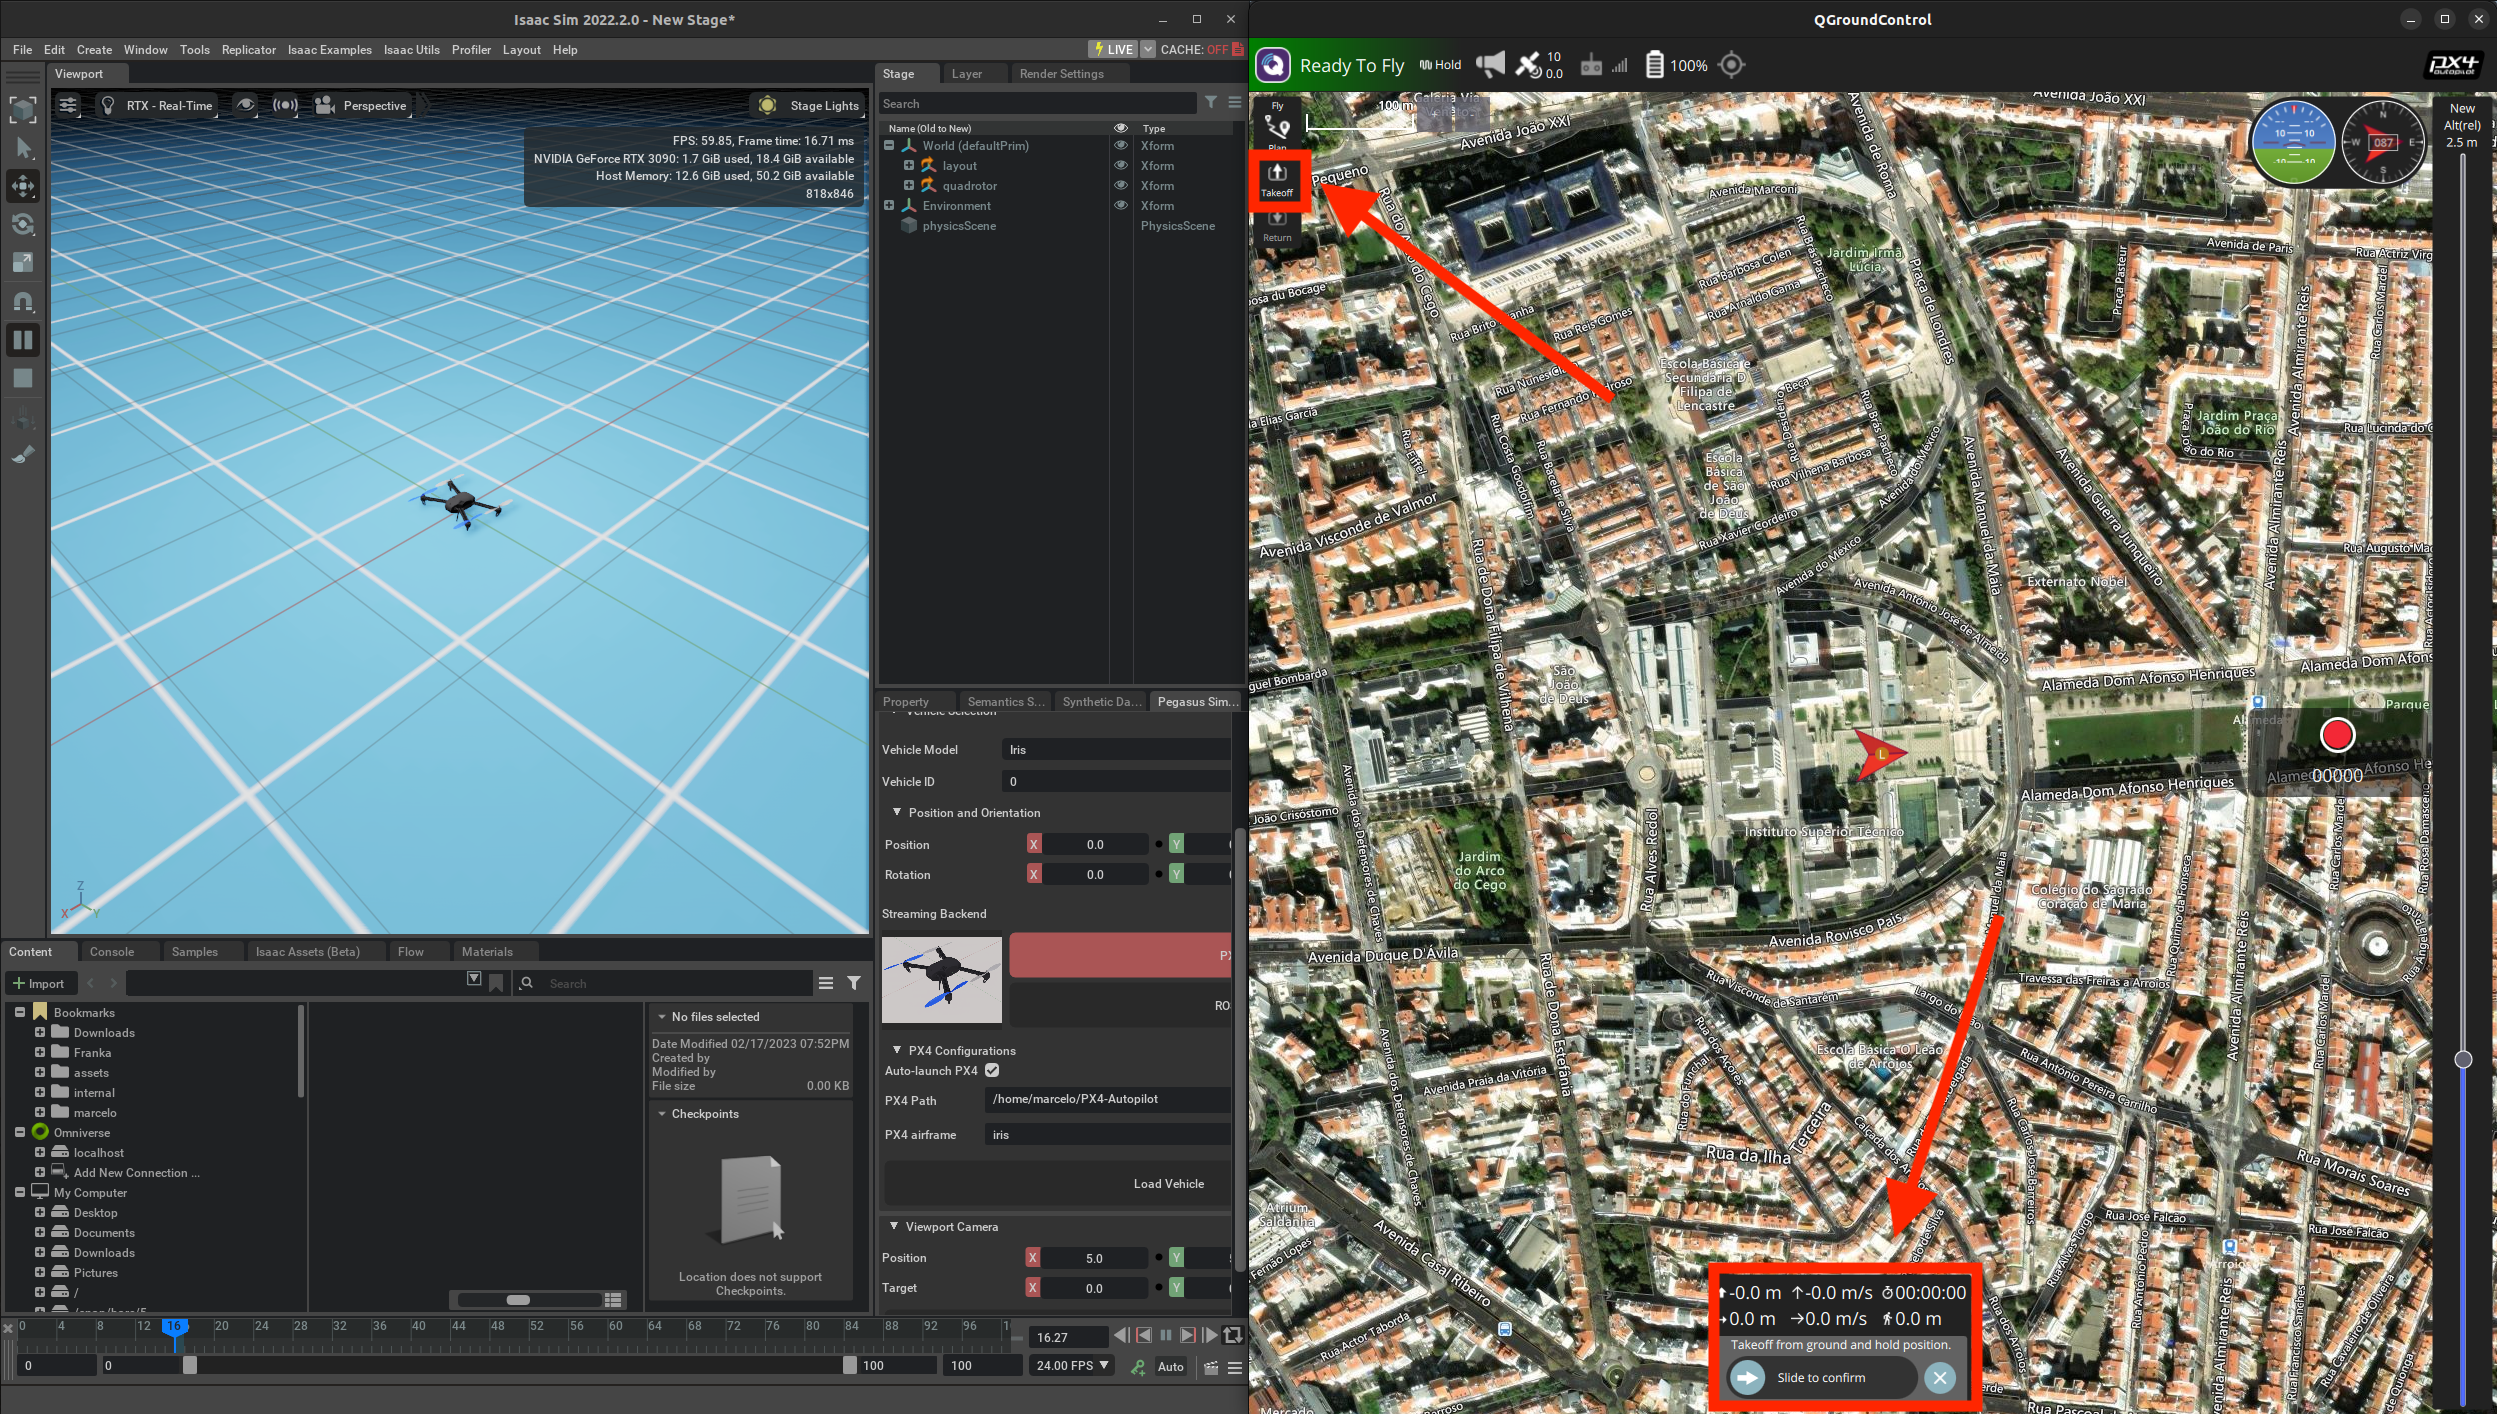
7. On QGroundControl, left-click on a place on the map, press Go to location and slide at the bottom of the screen
to confirm the target waypoint for the drone to follow.

Congratulations 🎉️🎉️🎉️ ! You have just completed your first tutorial and you should now see the vehicle moving on the screen.
A short video of this tutorial is also available here.
Note
Everything that you can do using the provided GUI can also be achieved by the Pegasus Simulator API in Python. In the next tutorials we will cover how to create standalone Python scripts to perform simulations.