Simulation with Moving People
In this tutorial, you will learn how to add moving people to your standalone simulations. This is useful for dynamic applications such as target tracking, surveillance, and search and rescue missions.
Note
Here we follow a different approach to simulate moving people than what is provided in the official NVIDIA Isaac Sim documentation. We believe that our API is simpler and more intuitive to use in most user cases. I also needed this for my own Ph.D. research :)
0. Preparation
This tutorial assumes that you have followed the Your First Simulation section first.
1. Code
The tutorial corresponds to the 9_people.py example in the examples directory.
  1#!/usr/bin/env python
  2"""
  3| File: 9_people.py
  4| License: BSD-3-Clause. Copyright (c) 2024, Marcelo Jacinto. All rights reserved.
  5| Description: This files serves as an example on how to build an app that makes use of the Pegasus API to run a simulation
  6| where people move around in the world.
  7"""
  8
  9# Imports to start Isaac Sim from this script
 10import carb
 11
 12from isaacsim import SimulationApp
 13
 14# Start Isaac Sim's simulation environment
 15# Note: this simulation app must be instantiated right after the SimulationApp import, otherwise the simulator will crash
 16# as this is the object that will load all the extensions and load the actual simulator.
 17simulation_app = SimulationApp({"headless": False})
 18
 19# -----------------------------------
 20# The actual script should start here
 21# -----------------------------------
 22import omni.timeline
 23from omni.isaac.core.world import World
 24from isaacsim.core.utils.extensions import enable_extension
 25
 26# Enable/disable ROS bridge extensions to keep only ROS2 Bridge
 27enable_extension("isaacsim.ros2.bridge")
 28
 29# Update the simulation app with the new extensions
 30simulation_app.update()
 31
 32# -------------------------------------------------------------------------------------------------
 33# These lines are needed to restart the USD stage and make sure that the people extension is loaded
 34# -------------------------------------------------------------------------------------------------
 35import omni.usd
 36omni.usd.get_context().new_stage()
 37
 38import numpy as np
 39
 40# Import the Pegasus API for simulating drones
 41from pegasus.simulator.params import ROBOTS, SIMULATION_ENVIRONMENTS
 42from pegasus.simulator.logic.interface.pegasus_interface import PegasusInterface
 43from pegasus.simulator.logic.people.person import Person
 44from pegasus.simulator.logic.people.person_controller import PersonController
 45from pegasus.simulator.logic.graphical_sensors.monocular_camera import MonocularCamera
 46from pegasus.simulator.logic.backends.px4_mavlink_backend import PX4MavlinkBackend, PX4MavlinkBackendConfig
 47from pegasus.simulator.logic.backends.ros2_backend import ROS2Backend
 48from pegasus.simulator.logic.vehicles.multirotor import Multirotor, MultirotorConfig
 49from pegasus.simulator.logic.interface.pegasus_interface import PegasusInterface
 50
 51# Example controller class that make a person move in a circle around the origin of the world
 52# Note: You could create a different controller with a different behaviour. For instance, you could:
 53# 1. read the keyboard input to move the person around the world.
 54# 2. read the target position from a ros topic,
 55# 3. read the target position from a file,
 56# 4. etc.
 57class CirclePersonController(PersonController):
 58
 59    def __init__(self):
 60        super().__init__()
 61
 62        self._radius = 5.0
 63        self.gamma = 0.0
 64        self.gamma_dot = 0.3
 65
 66    def update(self, dt: float):
 67
 68        # Update the reference position for the person to track
 69        self.gamma += self.gamma_dot * dt
 70
 71        # Set the target position for the person to track
 72        self._person.update_target_position([self._radius * np.cos(self.gamma), self._radius * np.sin(self.gamma), 0.0])
 73
 74
 75# Auxiliary scipy and numpy modules
 76from scipy.spatial.transform import Rotation
 77
 78# -------------------------------------------------------------------------------------------------
 79# Define the PegasusApp class where the simulation will be run
 80# -------------------------------------------------------------------------------------------------
 81class PegasusApp:
 82    """
 83    A Template class that serves as an example on how to build a simple Isaac Sim standalone App.
 84    """
 85
 86    def __init__(self):
 87        """
 88        Method that initializes the PegasusApp and is used to setup the simulation environment.
 89        """
 90
 91        # Acquire the timeline that will be used to start/stop the simulation
 92        self.timeline = omni.timeline.get_timeline_interface()
 93
 94        # Start the Pegasus Interface
 95        self.pg = PegasusInterface()
 96
 97        # Acquire the World, .i.e, the singleton that controls that is a one stop shop for setting up physics,
 98        # spawning asset primitives, etc.
 99        self.pg._world = World(**self.pg._world_settings)
100        self.world = self.pg.world
101
102        # Launch one of the worlds provided by NVIDIA
103        #self.pg.load_environment(SIMULATION_ENVIRONMENTS["Curved Gridroom"])
104        self.pg.load_asset(SIMULATION_ENVIRONMENTS["Box Room"], "/World/layout")
105
106        # Check the available assets for people
107        people_assets_list = Person.get_character_asset_list()
108        for person in people_assets_list:
109            print(person)
110
111        # Create the controller to make on person walk around in circles
112        person_controller = CirclePersonController()
113        p1 = Person("person1", "original_male_adult_construction_05", init_pos=[3.0, 0.0, 0.0], init_yaw=1.0, controller=person_controller)
114
115        # Create a person without setting up a controller, and just setting a manual target position for it to track
116        p2 = Person("person2", "original_female_adult_business_02", init_pos=[2.0, 0.0, 0.0])
117        p2.update_target_position([10.0, 0.0, 0.0], 1.0)
118
119        config_multirotor = MultirotorConfig()
120        # Create the multirotor configuration
121        mavlink_config = PX4MavlinkBackendConfig({
122            "vehicle_id": 0,
123            "px4_autolaunch": True,
124            "px4_dir": "/home/marcelo/PX4-Autopilot"     # TODO -> Change this line to the path where you have the PX4-Autopilot code downloaded (this is an example on how you can set your own path for PX4)
125        })
126
127        config_multirotor.backends = [
128            PX4MavlinkBackend(mavlink_config),
129            ROS2Backend(vehicle_id=1,
130                config={
131                    "namespace": 'drone',
132                    "pub_sensors": False,
133                    "pub_graphical_sensors": True,
134                    "pub_state": True,
135                    "pub_tf": False,
136                    "sub_control": False,})]
137
138        config_multirotor.graphical_sensors = [MonocularCamera("camera", config={"update_rate": 60.0})]
139
140        Multirotor(
141            "/World/quadrotor",
142            ROBOTS['Pegasus'],
143            0,
144            [0.0, 0.0, 0.07],
145            Rotation.from_euler("XYZ", [0.0, 0.0, 0.0], degrees=True).as_quat(),
146            config=config_multirotor,
147        )
148
149        # Set the camera of the viewport to a nice position
150        self.pg.set_viewport_camera([5.0, 9.0, 6.5], [0.0, 0.0, 0.0])
151
152        # Reset the simulation environment so that all articulations (aka robots) are initialized
153        self.world.reset()
154
155        # Auxiliar variable for the timeline callback example
156        self.stop_sim = False
157
158    def run(self):
159        """
160        Method that implements the application main loop, where the physics steps are executed.
161        """
162
163        # Start the simulation
164        self.timeline.play()
165
166        # The "infinite" loop
167        while simulation_app.is_running() and not self.stop_sim:
168            # Update the UI of the app and perform the physics step
169            self.world.step(render=True)
170
171        # Cleanup and stop
172        carb.log_warn("PegasusApp Simulation App is closing.")
173        self.timeline.stop()
174        simulation_app.close()
175
176def main():
177
178    # Instantiate the template app
179    pg_app = PegasusApp()
180
181    # Run the application loop
182    pg_app.run()
183
184if __name__ == "__main__":
185    main()
2. Explanation
To start a pre-programmed simulation with moving people, you need to ensure that the People extension provided by NVIDIA is enabled. Note, in Isaac 4.5.0 we also need to create a new stage for the people extension to start properly.
23import omni.timeline
24from omni.isaac.core.world import World
25from isaacsim.core.utils.extensions import enable_extension
26
27# Enable/disable ROS bridge extensions to keep only ROS2 Bridge
28enable_extension("isaacsim.ros2.bridge")
29
30# Update the simulation app with the new extensions
31simulation_app.update()
32import omni.usd
33omni.usd.get_context().new_stage()
We also need to import the Person and the PersonController classes. This follows the same strategy adopted for the vehicles and the control backends.
61from pegasus.simulator.logic.people.person import Person
62from pegasus.simulator.logic.people.person_controller import PersonController
The PersonController is an interface class that a user defined controller must inherit from. This controller is responsible for defining the behavior of the person in the simulation.
In this example, our controller makes a person walk in circles, but you can define any behavior you want. For instance, you could:
read the keyboard input to move the person around the world.
read the target position from a ros topic,
read the target position from a file,
etc…
69# Example controller class that make a person move in a circle around the origin of the world
70# Note: You could create a different controller with a different behaviour. For instance, you could:
71# 1. read the keyboard input to move the person around the world.
72# 2. read the target position from a ros topic,
73# 3. read the target position from a file,
74# 4. etc.
75class CirclePersonController(PersonController):
76
77    def __init__(self):
78        super().__init__()
79
80        self._radius = 5.0
81        self.gamma = 0.0
82        self.gamma_dot = 0.3
83
84    def update(self, dt: float):
85
86        # Update the reference position for the person to track
87        self.gamma += self.gamma_dot * dt
88
89        # Set the target position for the person to track
90        self._person.update_target_position([self._radius * np.cos(self.gamma), self._radius * np.sin(self.gamma), 0.0])
Note
To check all the functions that you can implement in your controller, check the PersonController class in the API reference.
The next step is to create a person in the simulation. But, you let’s imagine you don’t know which 3D models are available. Well, you can call the static method Person.get_character_asset_list() function to list all the available models.
124        # Check the available assets for people
125        people_assets_list = Person.get_character_asset_list()
126        for person in people_assets_list:
127            print(person)
Now that you know which models you can load, you can create a person in the simulation. You can set the initial position, orientation, and the controller that will define the behavior of the person. Note that if you just want to send a person to a given position manually (without using a controller), you can! Just check “Person 2”.
129        # Create the controller to make on person walk around in circles
130        person_controller = CirclePersonController()
131        p1 = Person("person1", "original_male_adult_construction_05", init_pos=[3.0, 0.0, 0.0], init_yaw=1.0, controller=person_controller)
132
133        # Create a person without setting up a controller, and just setting a manual target position for it to track
134        p2 = Person("person2", "original_female_adult_business_02", init_pos=[2.0, 0.0, 0.0])
135        p2.update_target_position([10.0, 0.0, 0.0], 1.0)
3. Execution
Now let’s run the Python script:
isaac_run examples/9_people.py
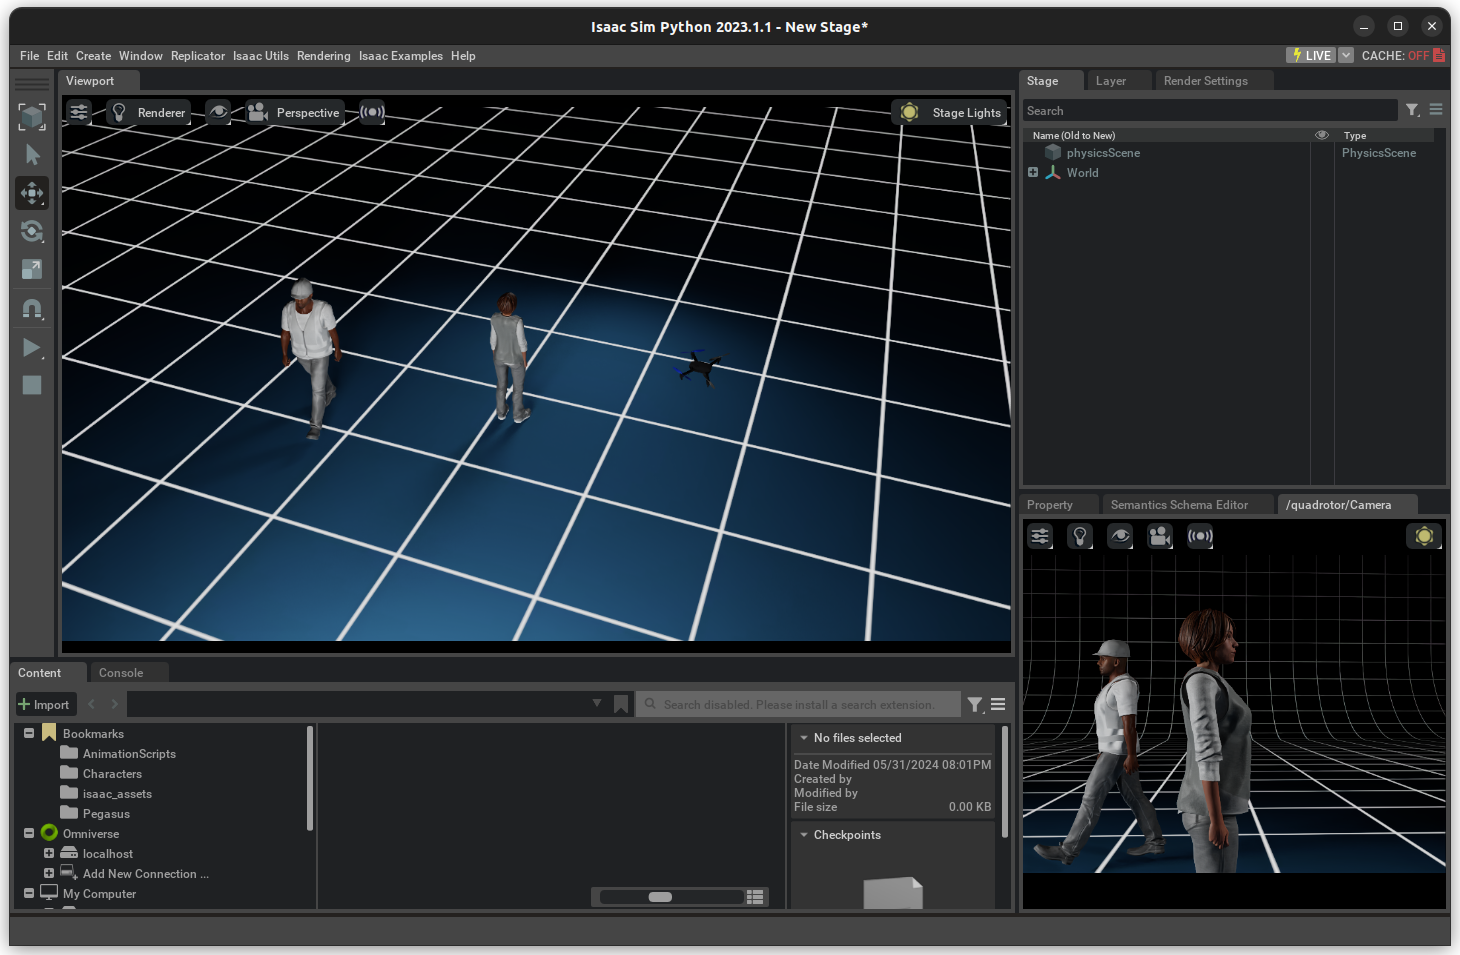
This should open a stage with a blue ground-plane with an 3DR Iris vehicle model in it. The simulation should start playing automatically and the stage being rendered. You will see 2 people being simulated with one of them walking in circles.
If you open QGroundControl you can control the vehicle.